Description
The Screw Gun is used to manipulate many of the blocks in BiblioCraft. It can be used for rotating most of the BiblioCraft blocks and is used to handle carpet with some of the blocks like the desk and table. The Screw Gun can also be used to rotate many of the Vanilla blocks as well.
Usage
The screw gun can rotate many of vanillas block by sneak right-clicking.
- The Piston
- Sticky Piston
- Dispensers
- Droppers
- Repeaters
- Comparators
- Levers (floor/ceiling only)
- Doors
- Single chests
- Ender chests
- Furnaces
- Anvils
Sneak right clicking will also rotate most bibliocraft blocks, including :
- Bookcase
- Armor Stand (Must sneak click the bottom block to rotate)
- Non-framed Desks, Dinner Plate, Disc Rack, Display Case
- Fancy Lamps and Fancy Lanterns
- Fancy Signs
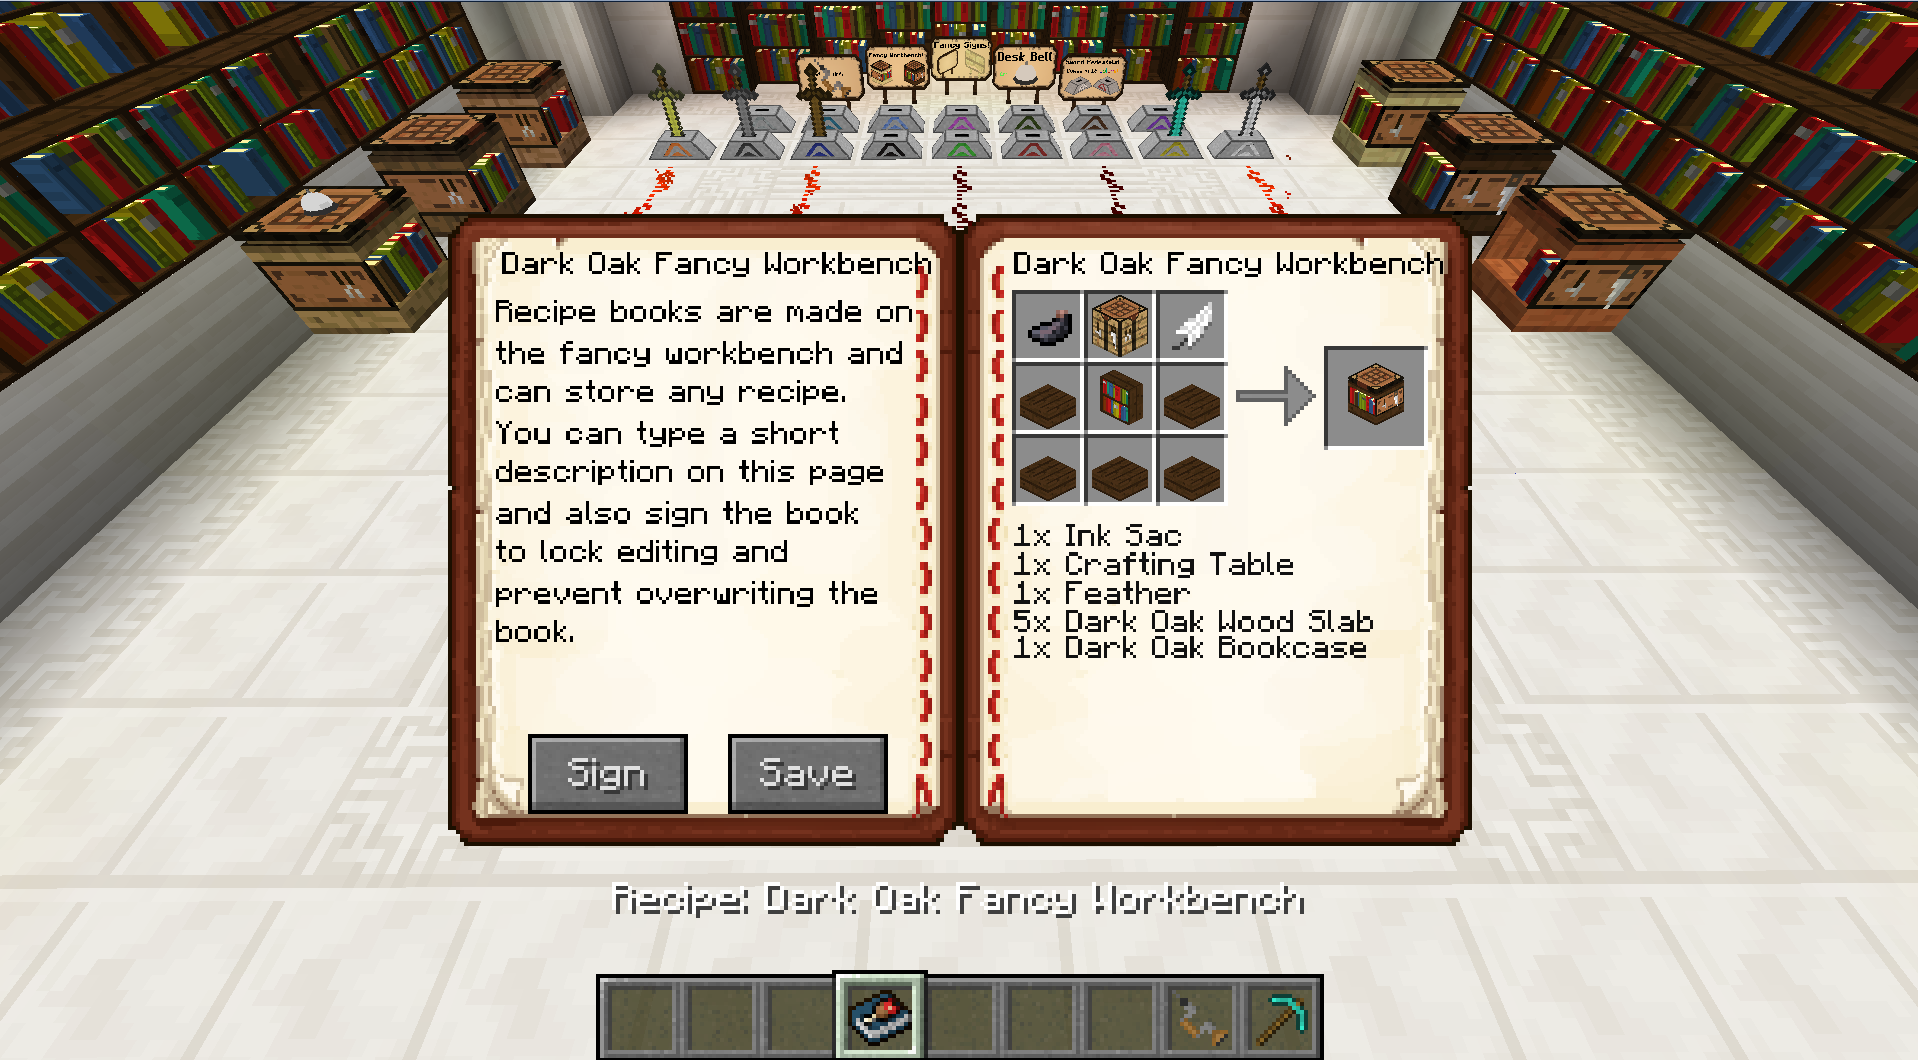
- Fancy Workbench
- Map Frames
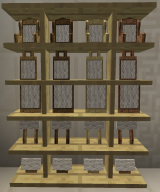
- Potion Shelves
- Printing Press
- Seats with Backs (When clicked on the side of the block)
- The Shelf
- Sword Pedestals
- Tool Racks
- Typesetting Table
- Typewriter
A number of BiblioCraft blocks can be shifted forward to the front of the block and in the case of the Fancy sign, even the center of the block. Right click with the Screw Gun to shift the block forward to the front of the block. Right click again to shift it back. Blocks that can be shifted include:
- Bookcase
- Clock
- Fancy Sign
- Potion Shelf
- Shelf (Only if clicked on the back of the shelf)
- Tool Rack (Only if clicked on the back of the rack)
Other BiblioCraft blocks have more specific behavior listed below
Sneak right click with the screw gun to initiate attaching 2 clocks together to make a grandfather clock. After a first clock is selected, sneak right click a clock directly above or below the first one to connect the clocks and make a grandfather clock. Repeat the same process to disconnect them.
Sneak right click with the screw gun to initiate attaching 2 desks together to make a longer desk. After a first desk is selected, sneak right click a clock directly to the left or right of the first one to connect the desks. Repeat the same process to disconnect them.
Right clicking with a screw gun will rotate the disc rack on a different axis than sneak right clicking.
The case will transition between the wall style and the floor style.
If a vanilla carpet is added to the inside of the case to color the fabric, when the Display Case is open, right clicking with the screw gun will remove the vanilla carpet.
- Fancy Lamps and Fancy Lanterns
Right clicking with a screw gun will change the design between a floor style, wall style, or ceiling style.
Right clicking with a screw gun will remove the map in the map frame.
Right clicking with the screw gun will rotate the painting in the frame
Sneak right clicking will initiate attaching 2 painting frames together to make a larger frame. After a first painting frame selected, sneak right click a painting frame directly to the left, right, top, or bottom of the first one to connect the painting frames. Repeat the same process to disconnect them.
If there is a seat back, right clicking the seat with the screw gun will remove the seat back.
After the seat back is removed, if there is vanilla carpet used to color the seat top and back fabric, right clicking the top of the seat will remove the carpet piece of the seat top.
If there is carpet under the seat, right clicking the side of the seat block will remove the carpet under the seat on the block.
Sneak right clicking will initiate attaching 2 seats together to make a larger frame. After a first seat is selected, sneak right click a seat directly to the left, right, front, or back of the first one to connect the seats. Repeat the same process to disconnect them.
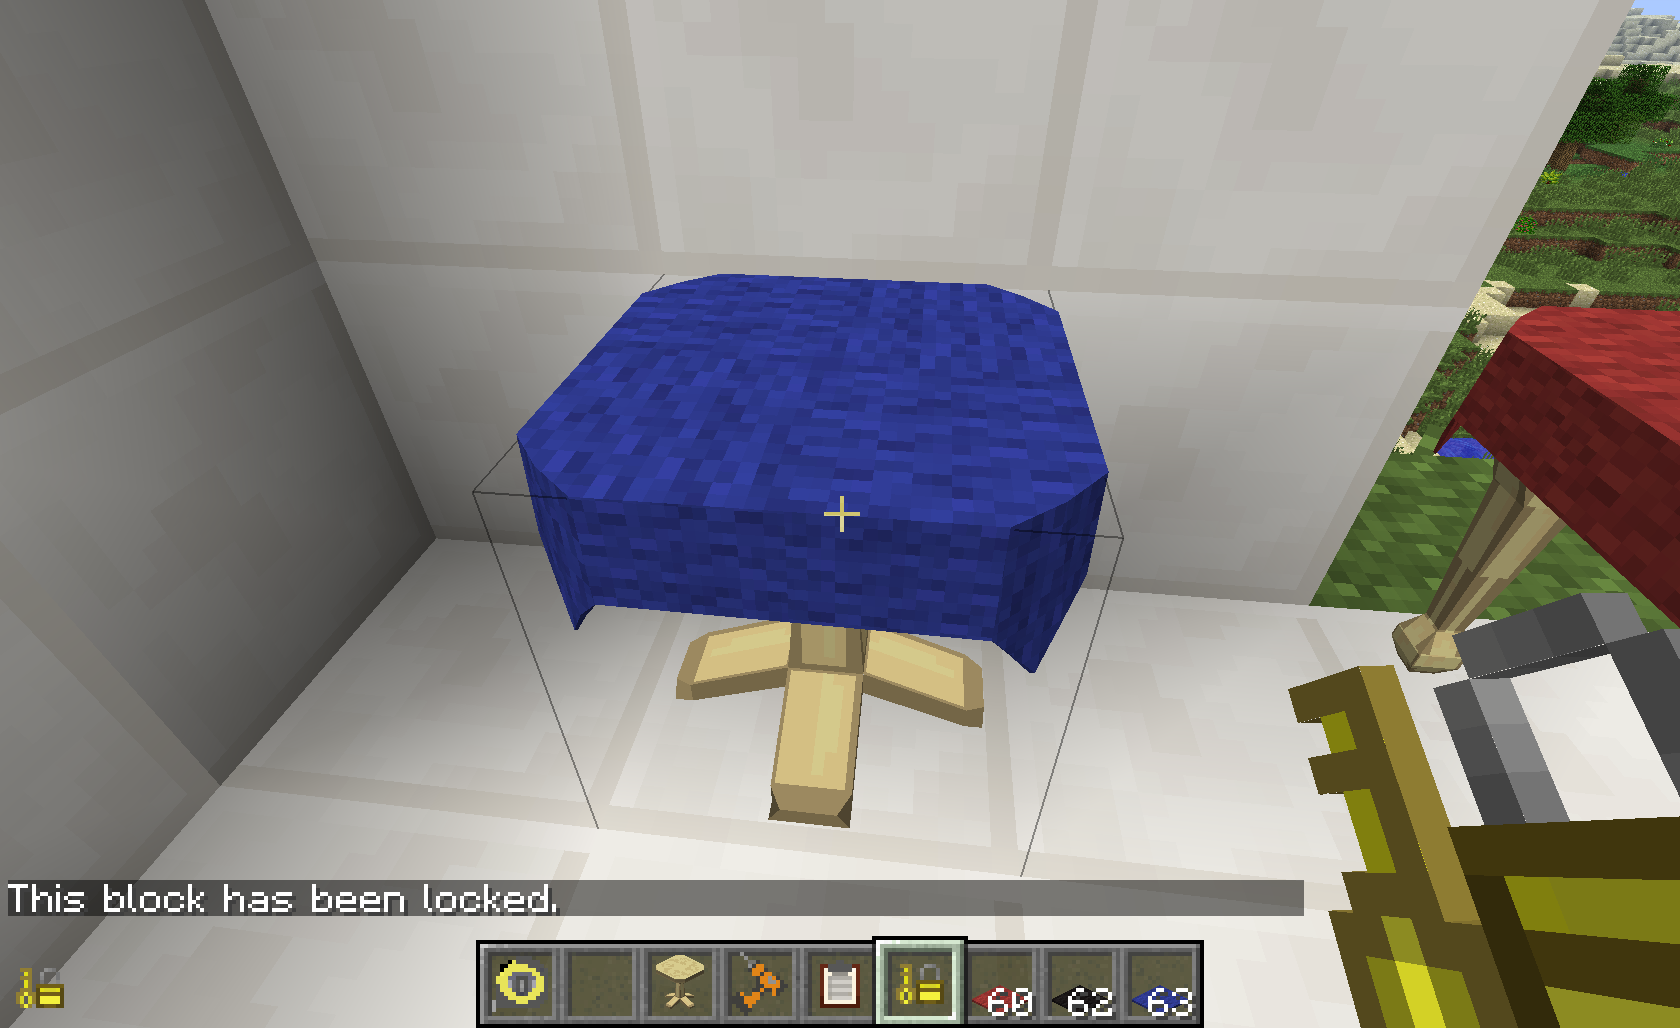
If a table has a tablecloth from placing a vanilla carpet on top of the table, Right click with the screw gun to remove the table cloth.
If there is a carpet on the floor under the table, Sneak right click with the screw gun anywhere on the table to remove the carpet.
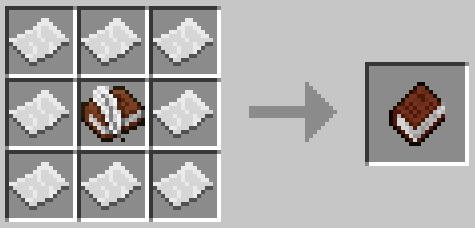
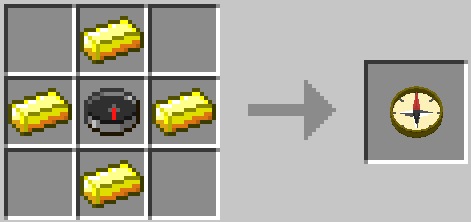
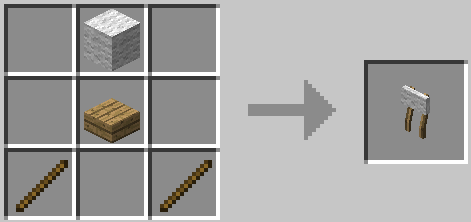
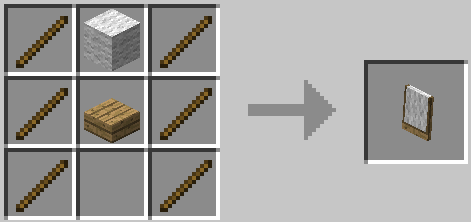
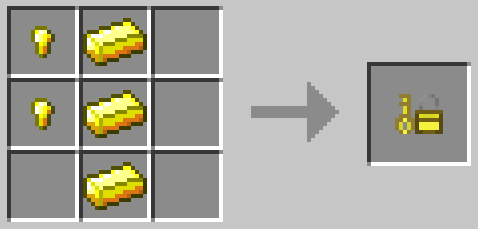
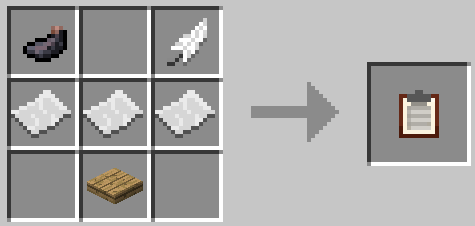
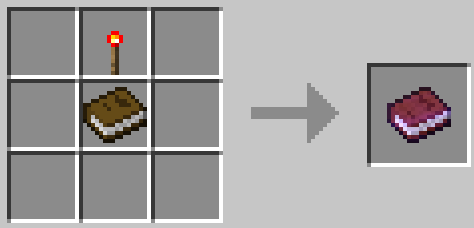
Recipe
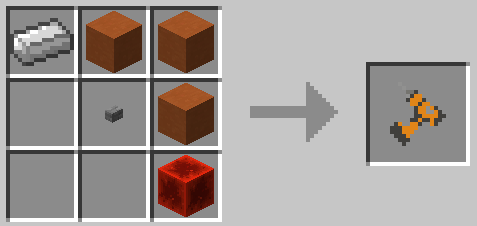
Important Note: The blocks in this recipe are Orange Stained Clay
Changelog
v1.10.3
*NEW FEATURE: The Potion Shelf, Tool Rack, Shelf and Clock can be shifted forward half a block with the screw gun / hand drill like the bookcase. Just right click on any one of these blocks with the screw gun or hand drill and it will shift forward. The tool rack and shelf will only shift forward if you right click the back of the block. This allows the blocks to still be able to hold the screw gun or hand drill.
v1.10.0
*New feature – Attachable desks. Use the screw gun or hand drill and sneak-right click a desk, than sneak right click a desk to the left or right of that desk to connect them and get a new style desk. Can be an unlimited number of desks wide. This only works with the new framed desks.
v1.8.0
*Added ability to rotate sword pedestal, fancy workbench, and fancy sign with the screw gun / hand drill when sneak-clicking. This technique should work for most BiblioCraft blocks, exceptions are those that have other functions with the screw gun on sneak clicking such as the seats, clocks, and painting frames.
v1.7.3
*Fixed signs not shifting forward with the screw gun after the 1.7.1 update (opps)
v1.7.1
*New Feature: added ability to add carpets under seats. Right click with a piece of carpet on any of the 4 sides of the seat to add carpet. To add a seat carpet, you now much right click the top of the seat. Right click the any of the 4 sides with the screw gun to
v1.7.0
*Added fancy sign support to the screw gun
*New Item: Hand Drill, A low tech version of the screw gun. All the same features and functions as a screw gun, but with a different look and new sounds.
*New Mechanic: Bookcases can be adjusted to sit on either the front or back of a block by right clicking with the screw gun or the hand drill on a bookcase.
v1.6.0
*Upgraded Display cases now accept a minecraft carpet to color the inside of the case to any of the 16 colors. Only works when the case is open and must use the screw gun to remove the carpet like the table and seats.
v1.5.1
*Upgraded Table to now allow carpets to be placed under them. To place a carpet under the table, right click with the carpet of your choice on one of the 4 sides (North, South, East, or West) of the table. To remove the carpet, sneak right click anywhere on the table with a screw gun.
v1.5.0
*Huge Screw Gun upgrade. The screw gun can now rotate and manipulate every block in BiblioCraft except the cookie jar. Most blocks, sneak right-clicking will rotate the block. With some cases, such as the lamps, lanterns, and cases, the “style” will change when just right clicking with the screw gun. The lamps and lanterns will change from floor, to wall, to ceiling styles and back again. The cases will change from floor to wall styles. The screw gun can also rotate many of vanillas block by sneak right-clicking. The piston, sticky piston, dispensers, droppers, repeaters, comparators, levers (floor/ceiling only), doors, single chests, ender chests, furnaces and finally anvils can all be rotated in this manner.
*Added Seat support to the screwgun. Connect/Disconnect seats, remove carpets and seat upholstery.
v1.4.0
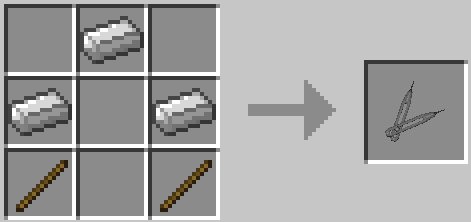
*New Item: Screw gun. Currently only used to removed table cloths from tables by right clicking the top of the table and to adjust items on tables by right clicking the sides of the table. I have some plans to make more uses out of this. This will kind of be a general tool for manipulating various elements in BiblioCraft.


Log In
Register